A Little Static; the Story, 2023
For a few years now, I've wanted to be able to make furniture. It has always seemed like a combination of things that I would enjoy: building something physical, with my hands; tinkering around with a design that would please my fussy aesthetic; nerding out about tools and techniques. You know, all that good stuff. But there always seemed to be something that I had to do "first", before I could make a piece of furniture.
First, I built the shop itself. But then it's not really big enough to do big panels in, so I had to figure out how to work in half of a garage stall when I needed to work on panel stuff. Then I had to make an assembly table to work on things on, to practice on small projects, to build a stand for my compact table saw, and so on and so forth. I kept finding ways to add stuff to the top of the list.
This summer, I sort of had an epiphany (slash-midlife-crisis). Stop inventing reasons to not try things and start trying them. The way to get better at stuff is to do it. Banal stuff, sure, but sometimes one gets caught up in irrelevant details.
And then one of my favorite YouTube woodworkers talked about a social media challenge thing aimed at woodworkers, trying to get them to try something new. "Well," I said. "You've always wanted to try making furniture. That's new."
And then a friend of mine mentioned he was trying to find a good home for bunch of cherry his father-in-law had milled out of an old tree they had to have taken out. Seemed like too much of a coincidence. So I picked up a set of plans and started modifying them to my space, materials, and tools.
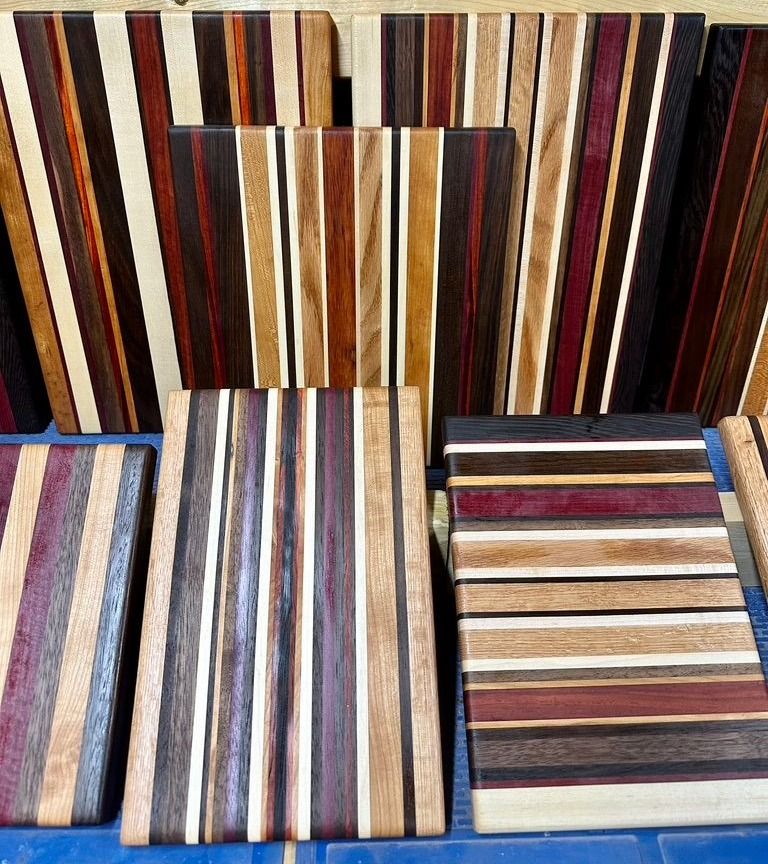
It's not that I haven't built "furniture" before. It's just... always been of the "butt a couple boards together and add screws" workaday variety. This sort of thing:
Locate planks, cut to length, apply screws (and corner braces, if you're feeling frisky).
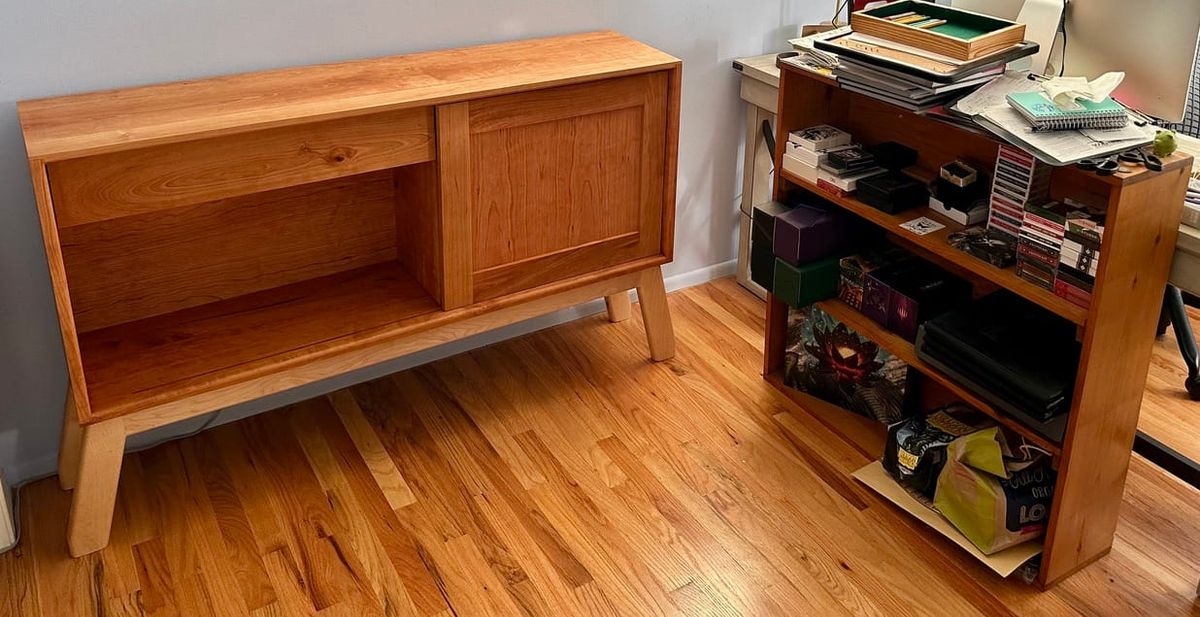
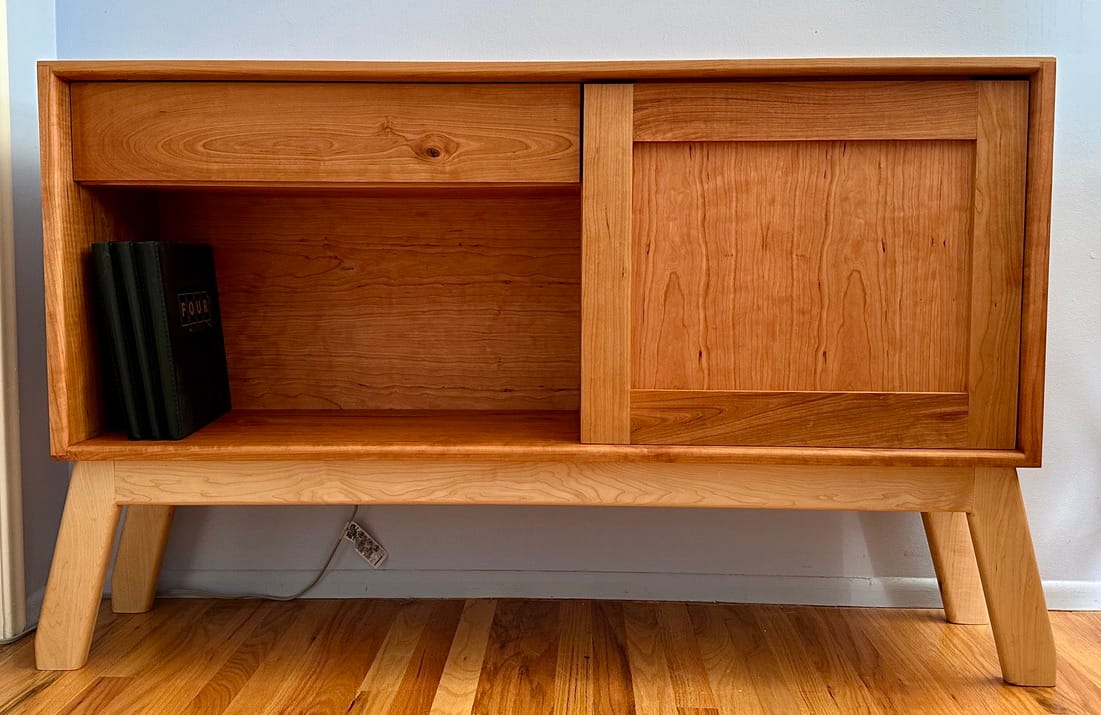
No offense to my past self, but this was going to be a whole other level of project: it's based on Foureyes Furniture's Static Media Console; just smaller, and with different legs. I wanted something taller and less chonky, that would fit neatly in my office rather than as a centerpiece in the living room.
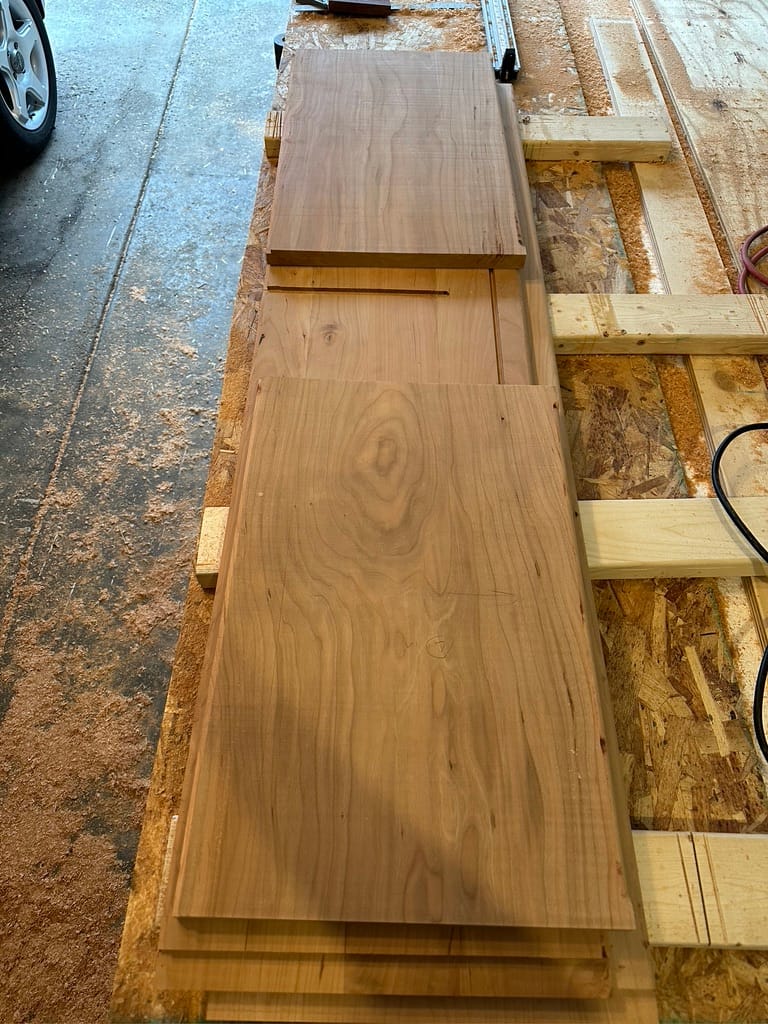
Step One: Many Panels Are Made
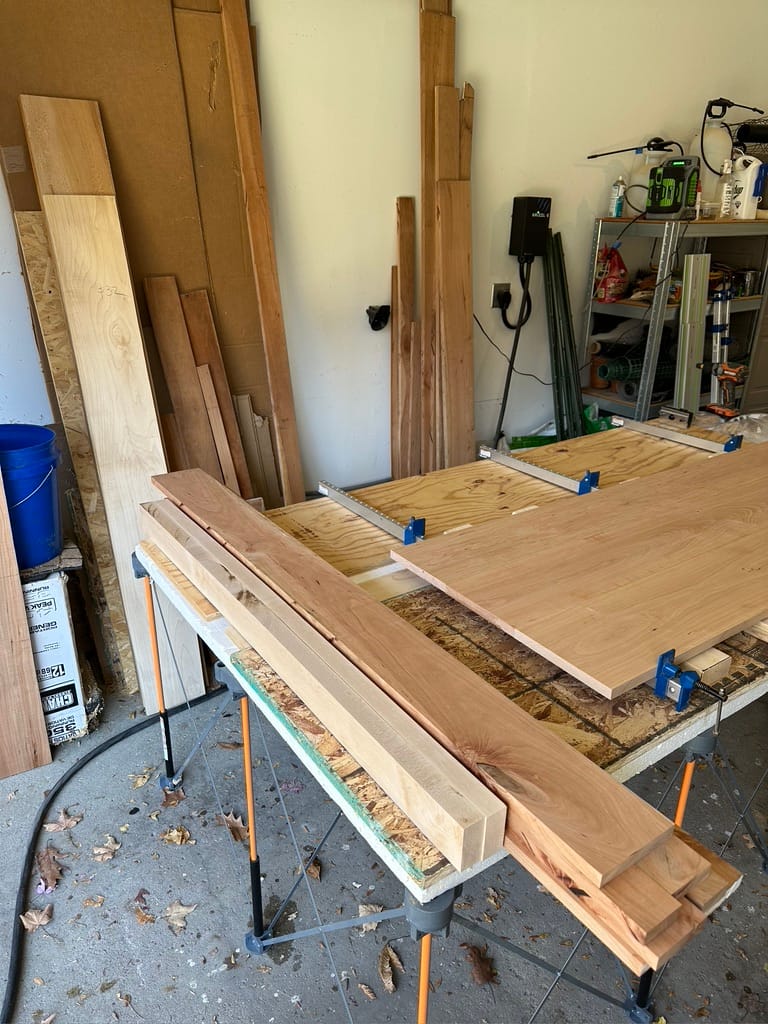
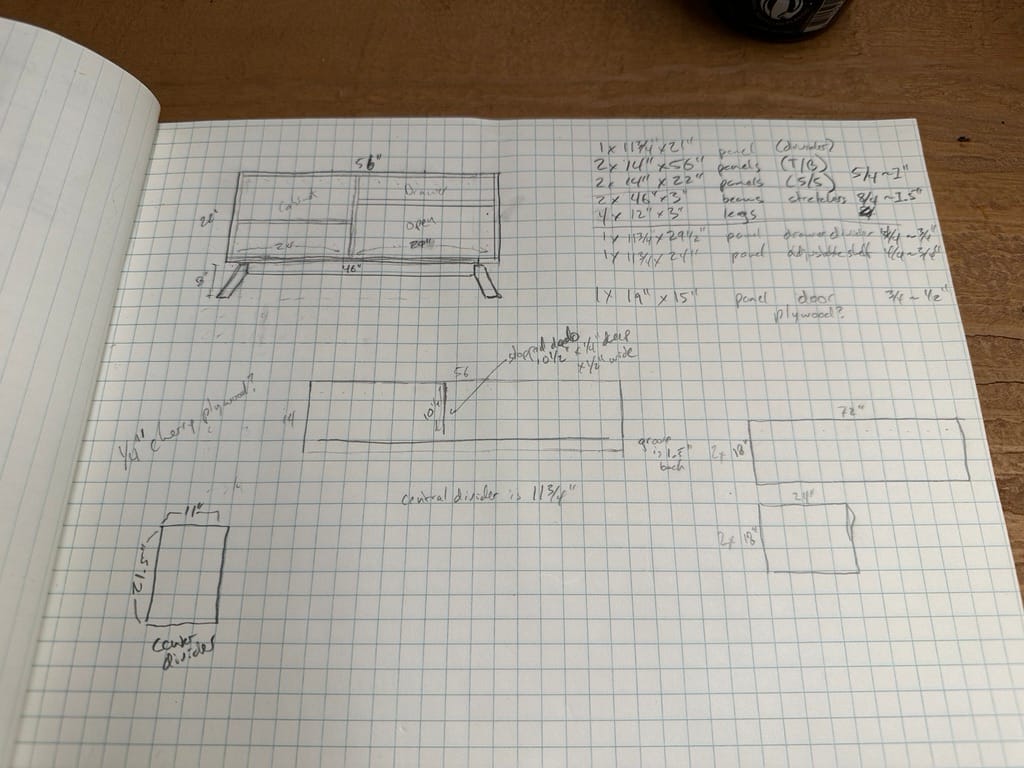
Yeah, my sketchwork isn't great but I knew I'd need a lot of panels!
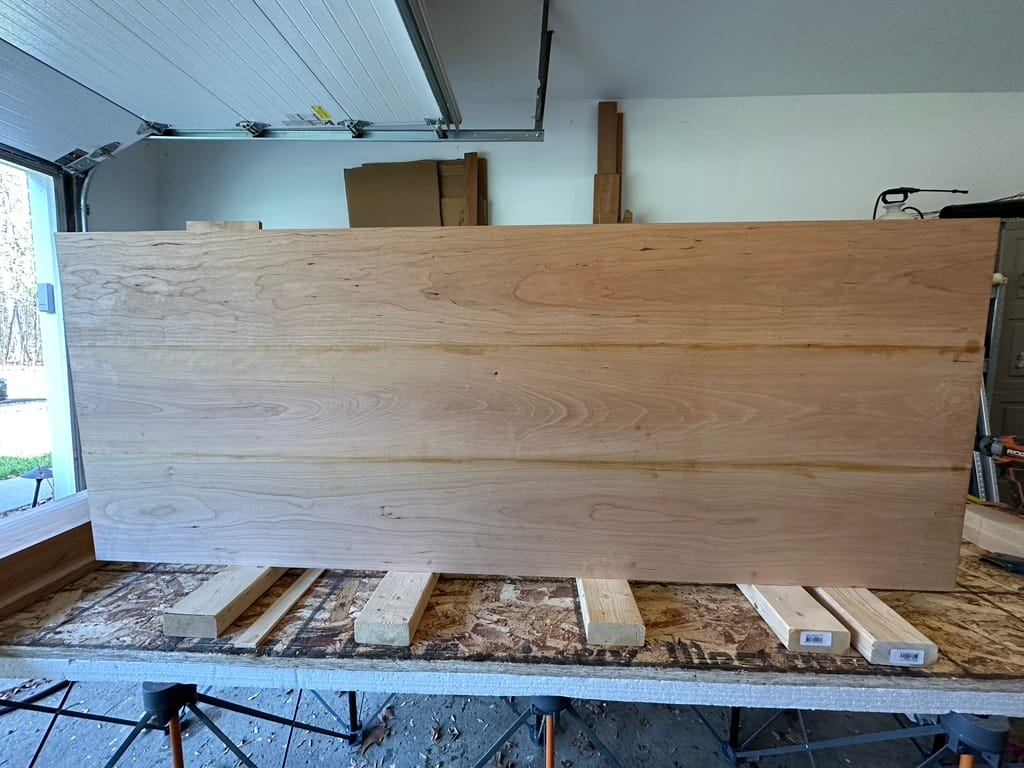
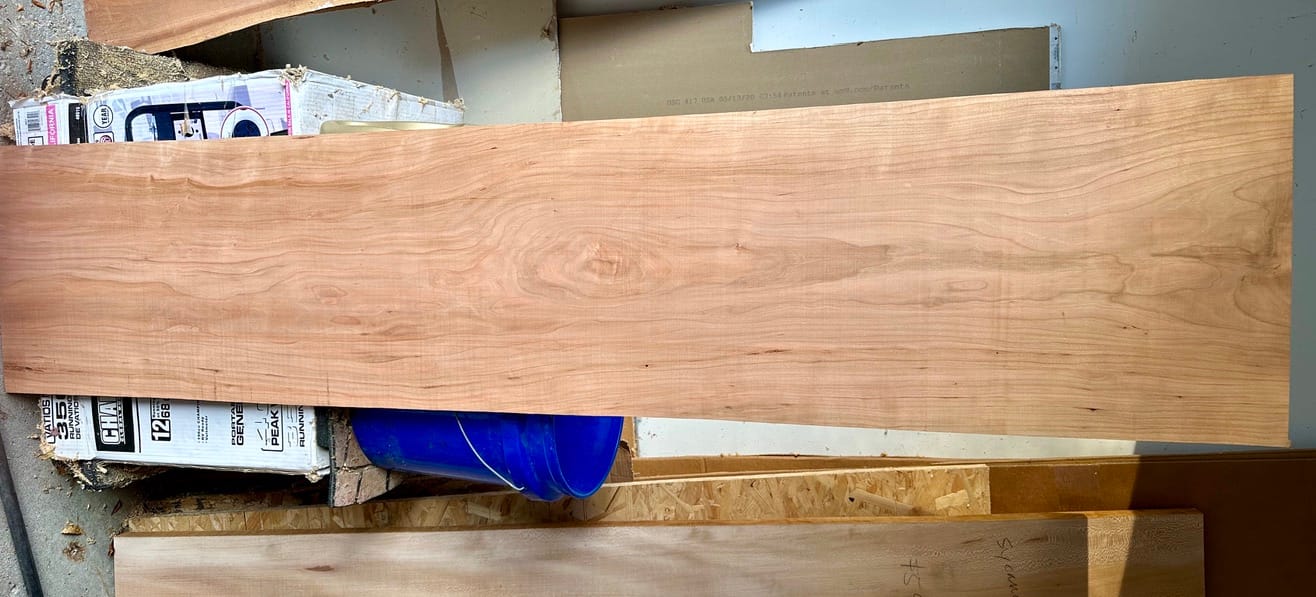
I started with milling down the hyper-local urban cherry I'd been gifted and gluing it back up into panels, of which I needed many. I also ventured over to the monthly lumber sale put on by a local tree service in order to find some roughly 6/4 hard maple for the legs, and while there I also found this completely staggering 16" wide cherry board. So I bought that too, thinking that would be a couple less panels I'd have to make! I really recommend checking for urban lumber sales in your area. You never quite know what you're going to find there, and hey, it's recycling!
I use dowels to help with alignment during panel glue-ups. Someday I'll have a domino, I'm sure.
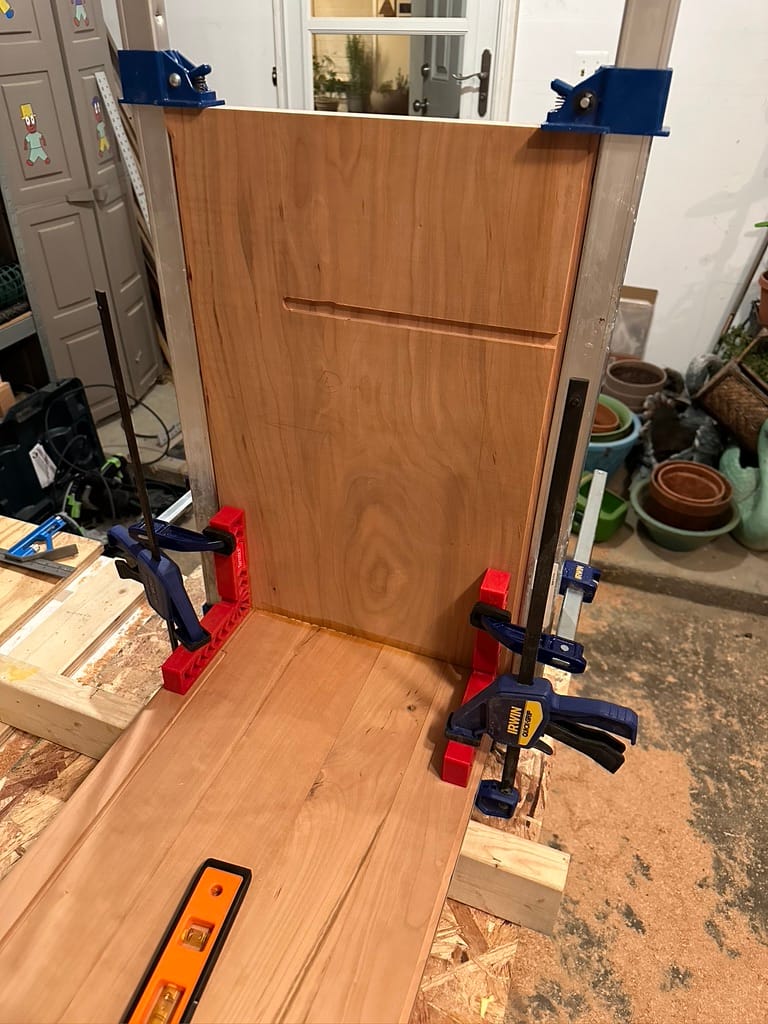
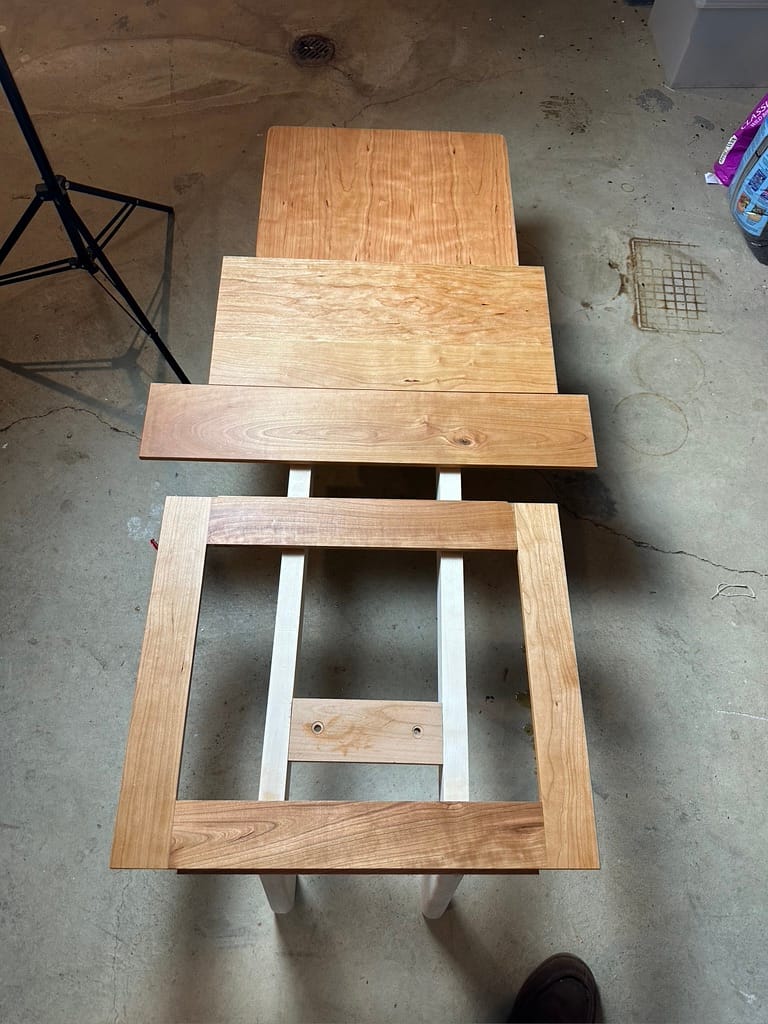
Step Two: Routing Details and Flat-Packing

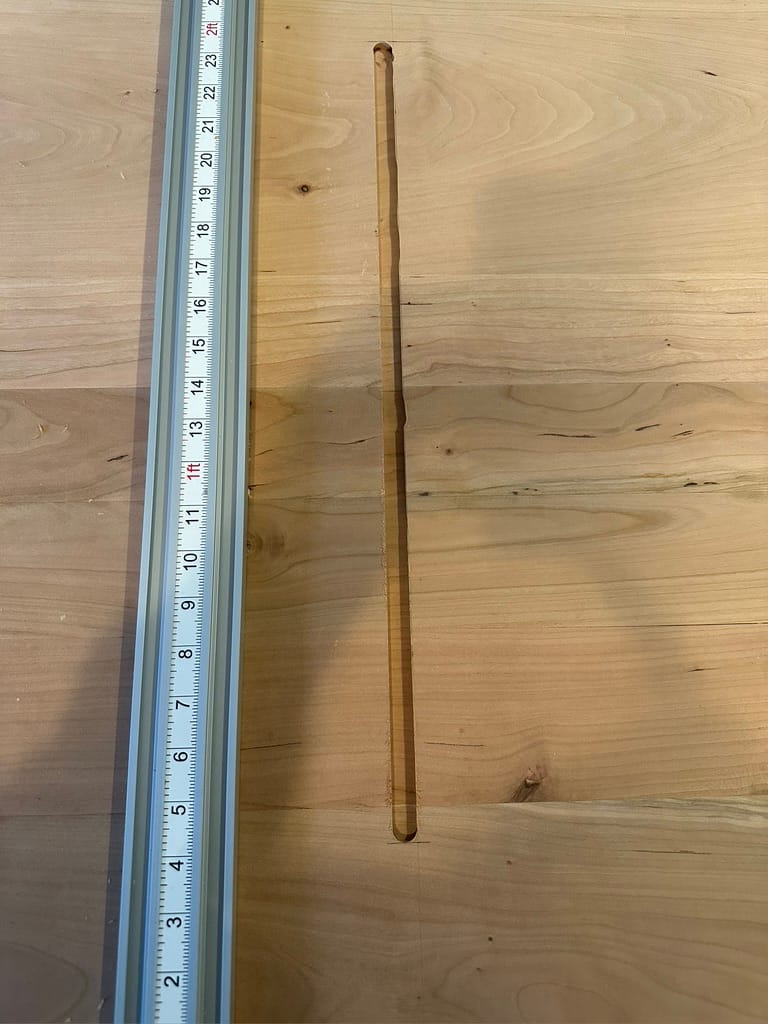
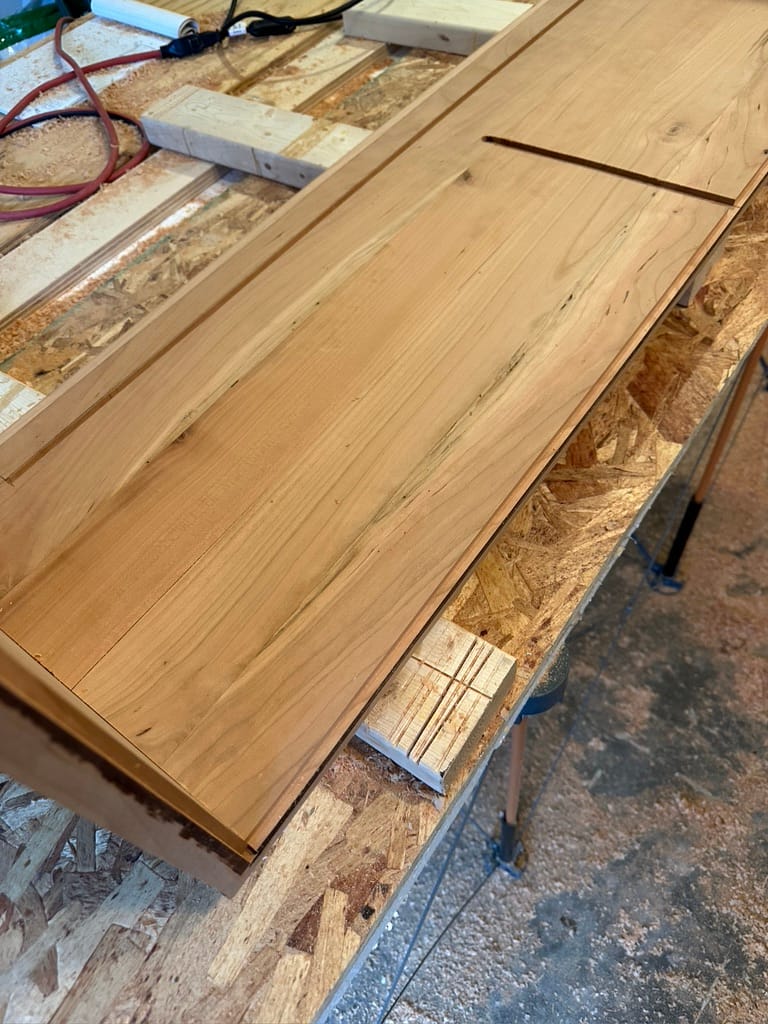
Once the panels are ready and cut to rough size, the real nerve-wracking work can begin: routing in rabbets on the top and bottom (to accept the side panels), stopped dadoes (for the center vertical divider), and grooves to facilitate a sliding door. Then more rabbets to hold the back panels, and a nice roundover detail along the front edge. At this point the project handily collapses into something that IKEA would be proud to sell you!
I'd never done these sorts of cuts before, and I did wander a little bit with the router—but happily, within the margin for error—any wandering dado is covered by the shoulder of the tenon, phew. "Happy little accidents," I muttered to myself. "Making mistakes is how you learn."
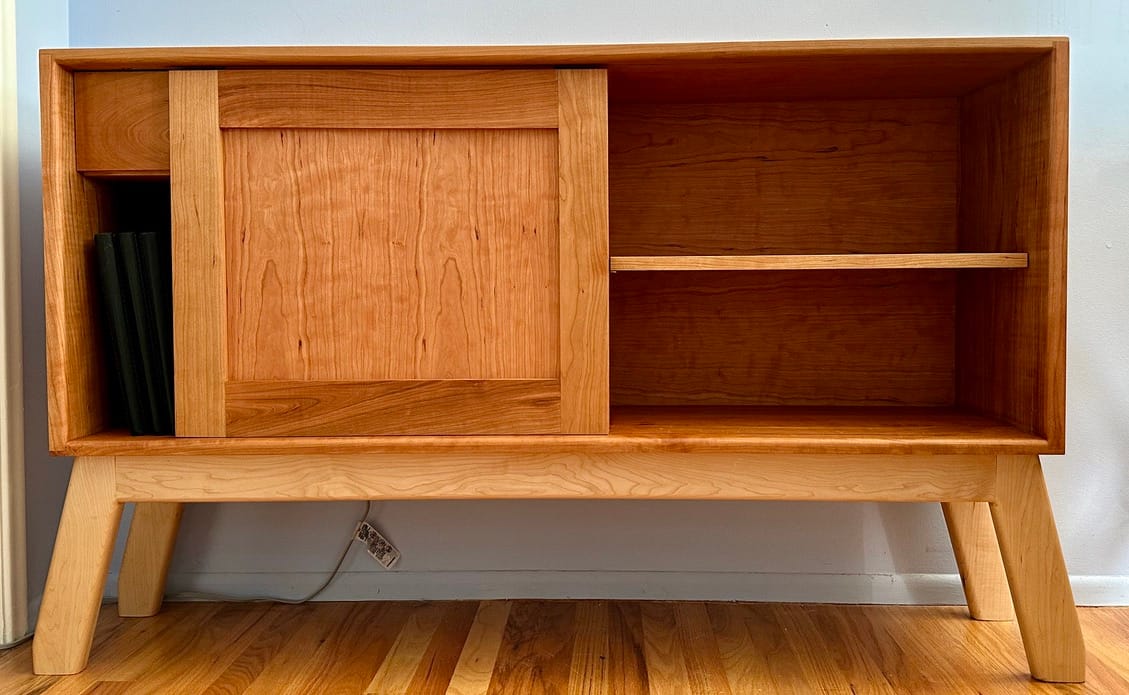
I modified the original design to have a horizontal divider holding a drawer as well—I knew I wanted a large open area for folders and binders, etc. rather than more drawers. I held off on placing those stopped dadoes until I'd test-fit the assembly. This was a wise decision.
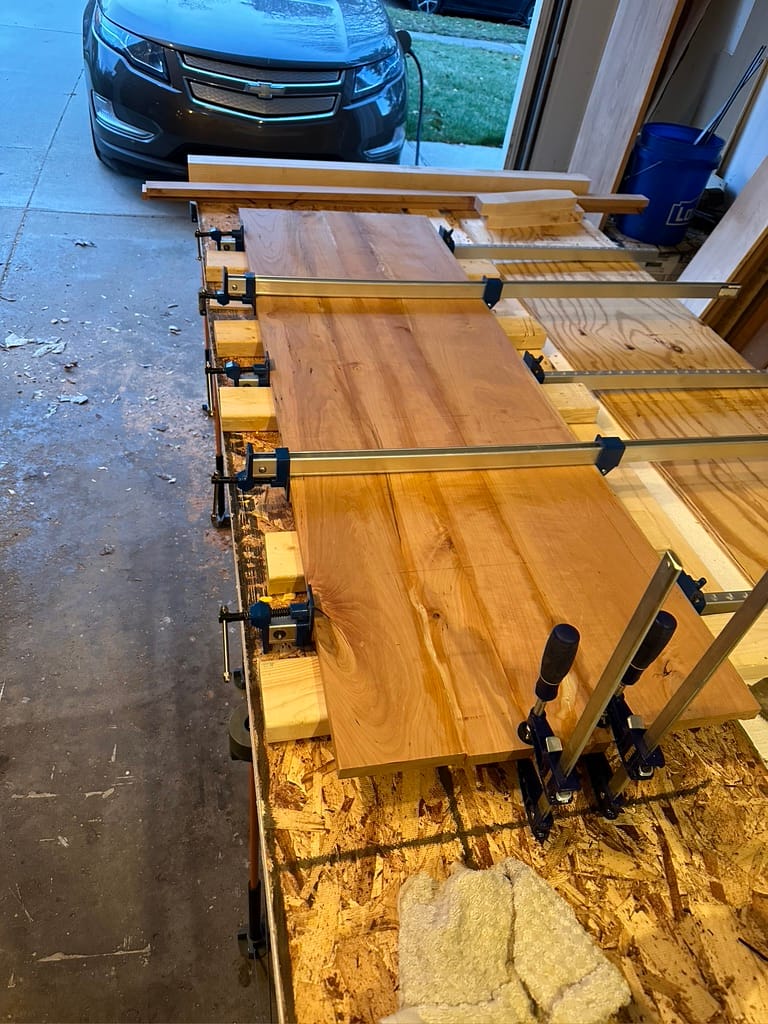
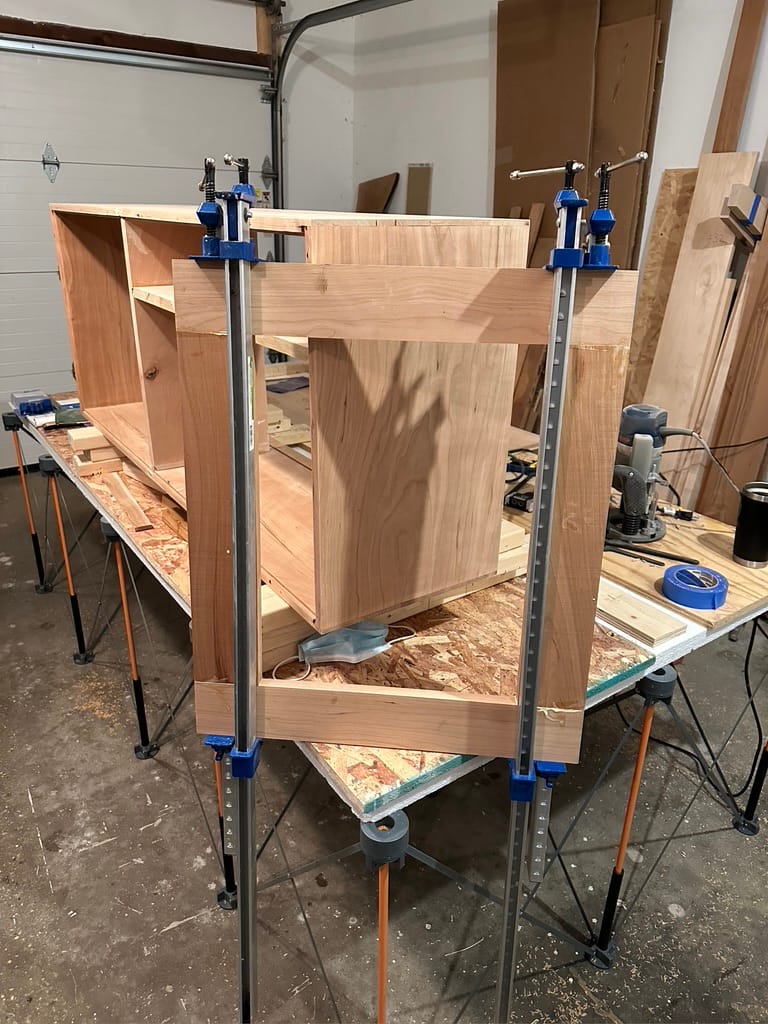
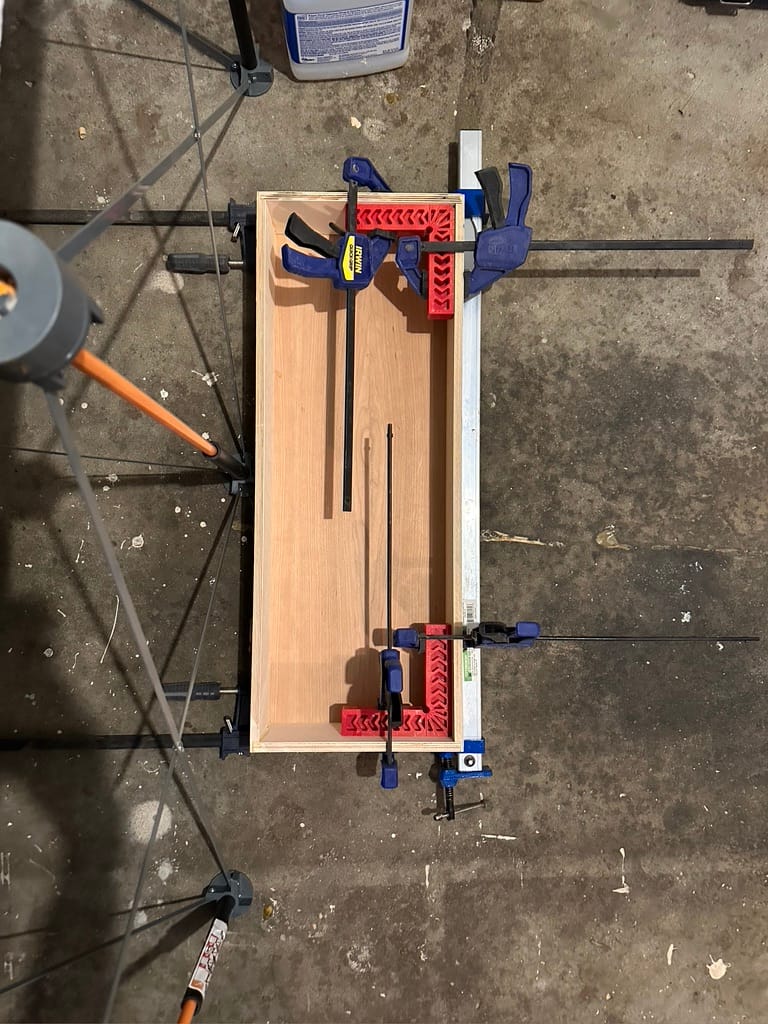
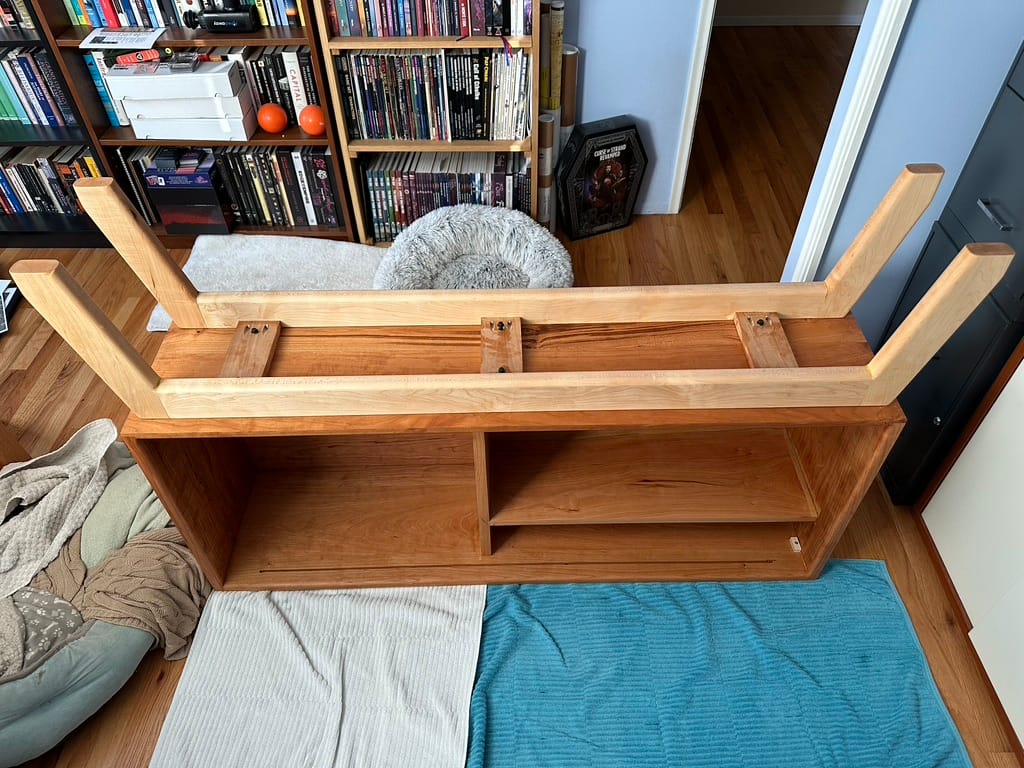
Step Three: How Many Clamps Do You Have?
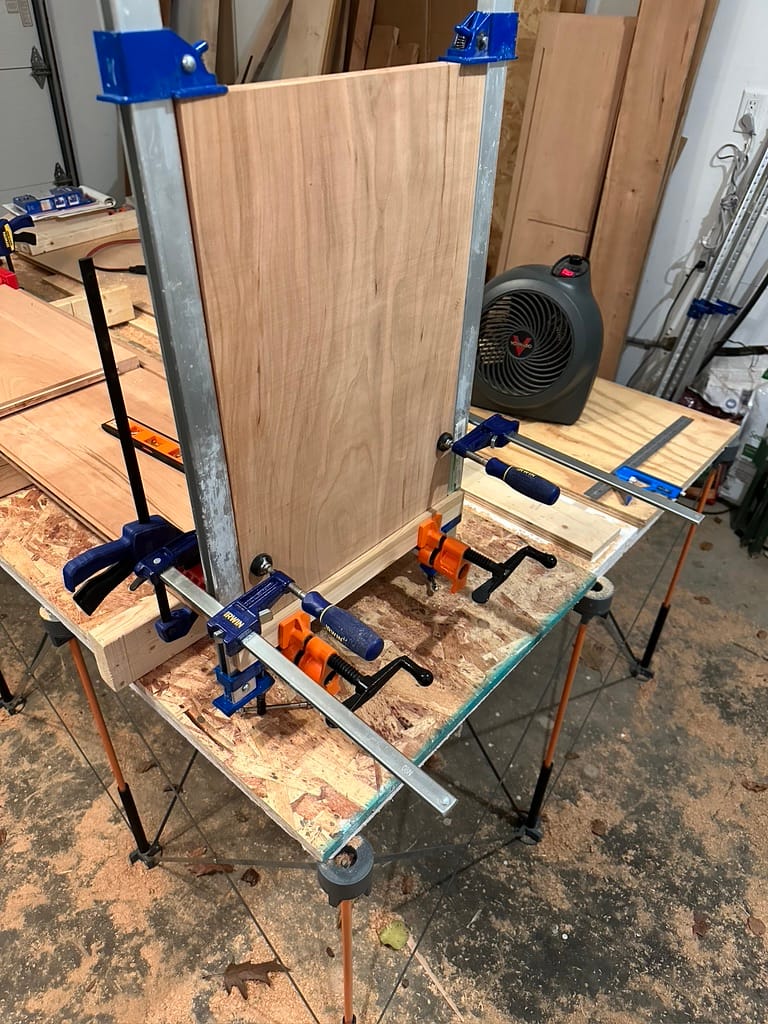
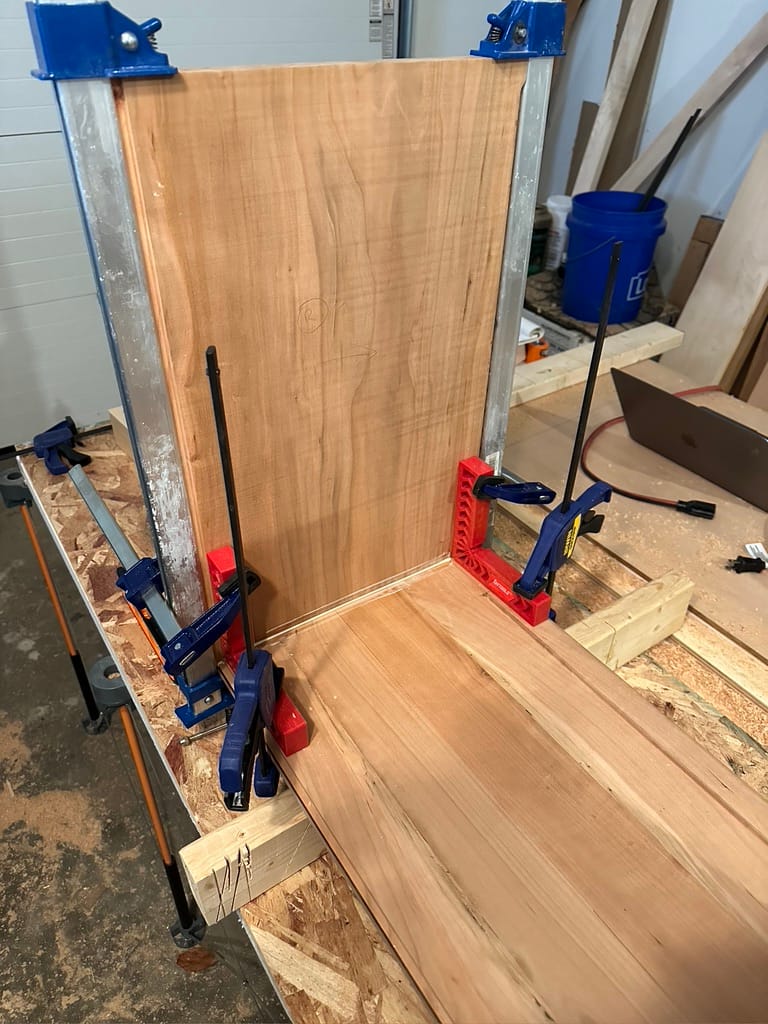
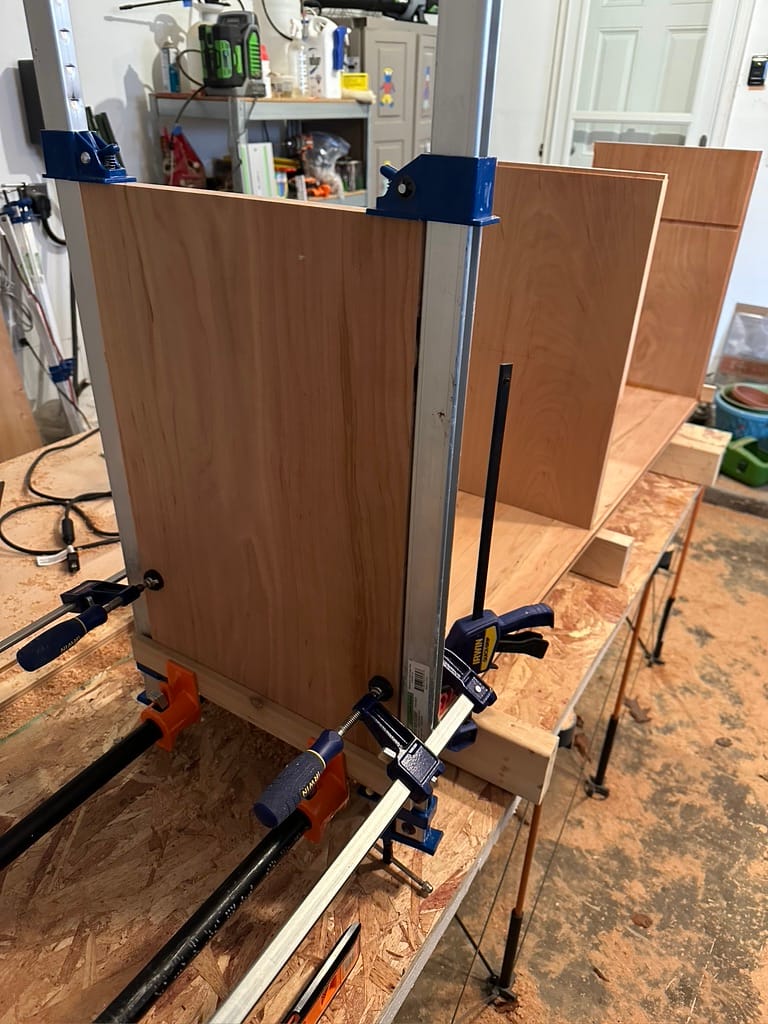
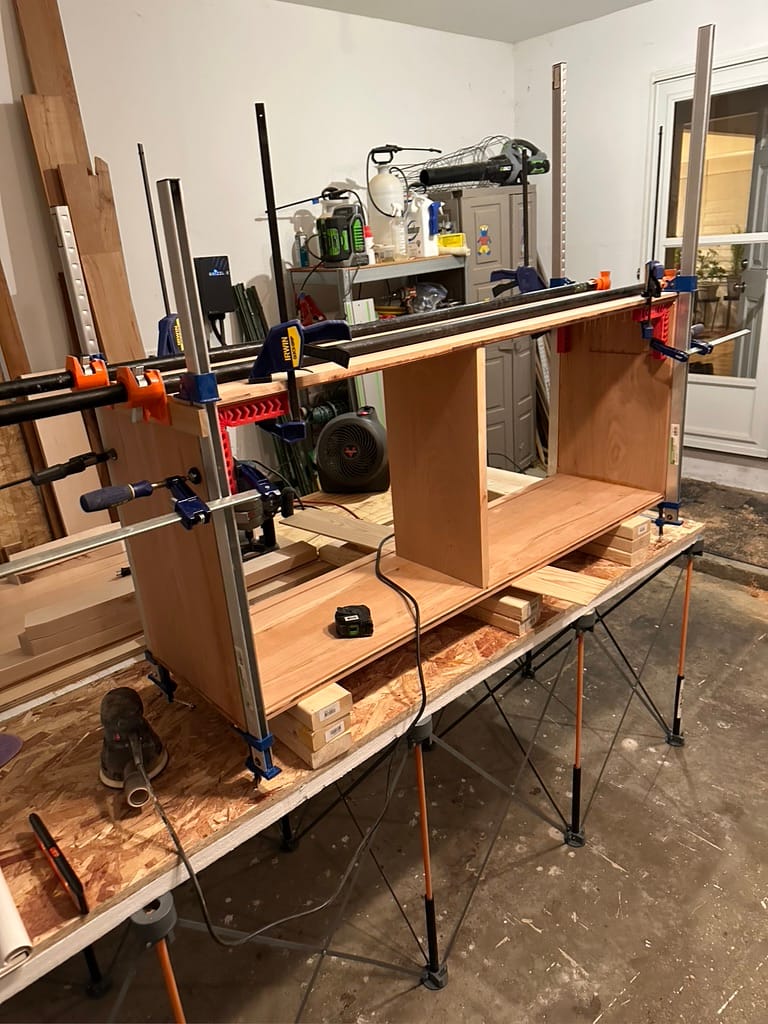
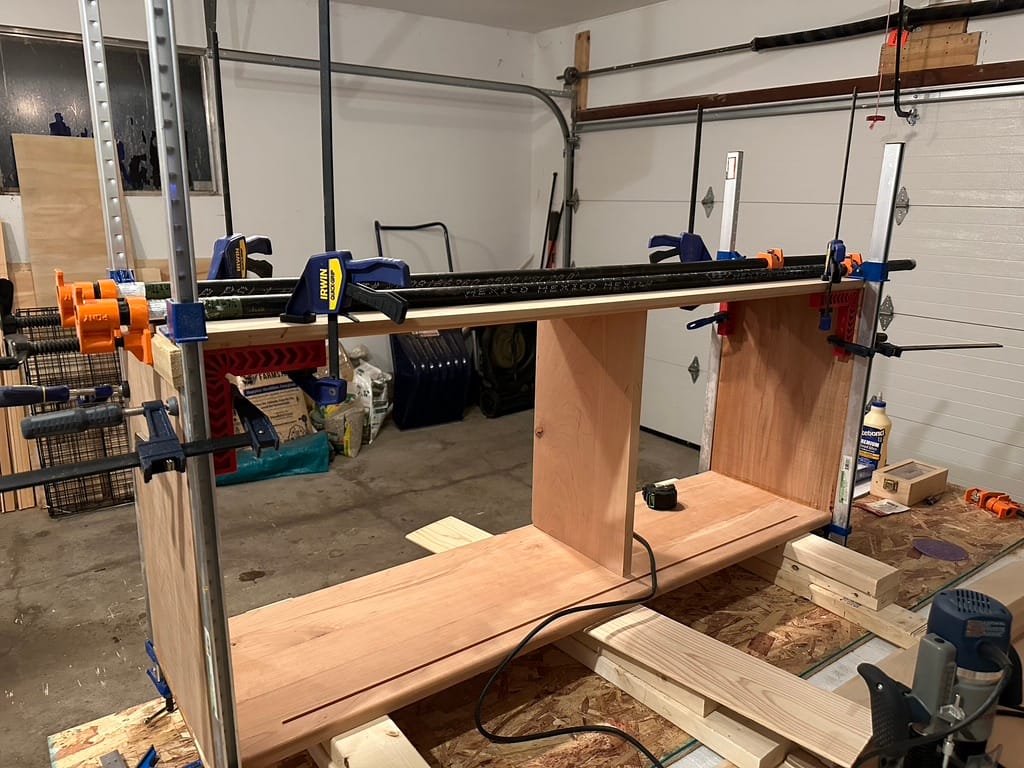
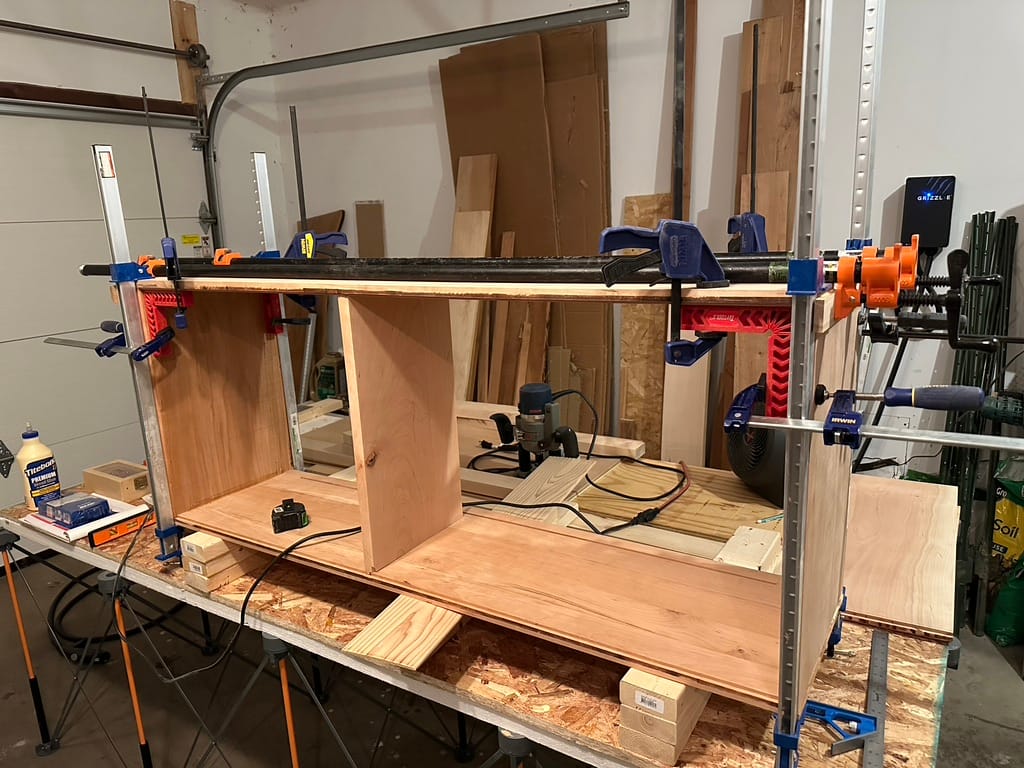
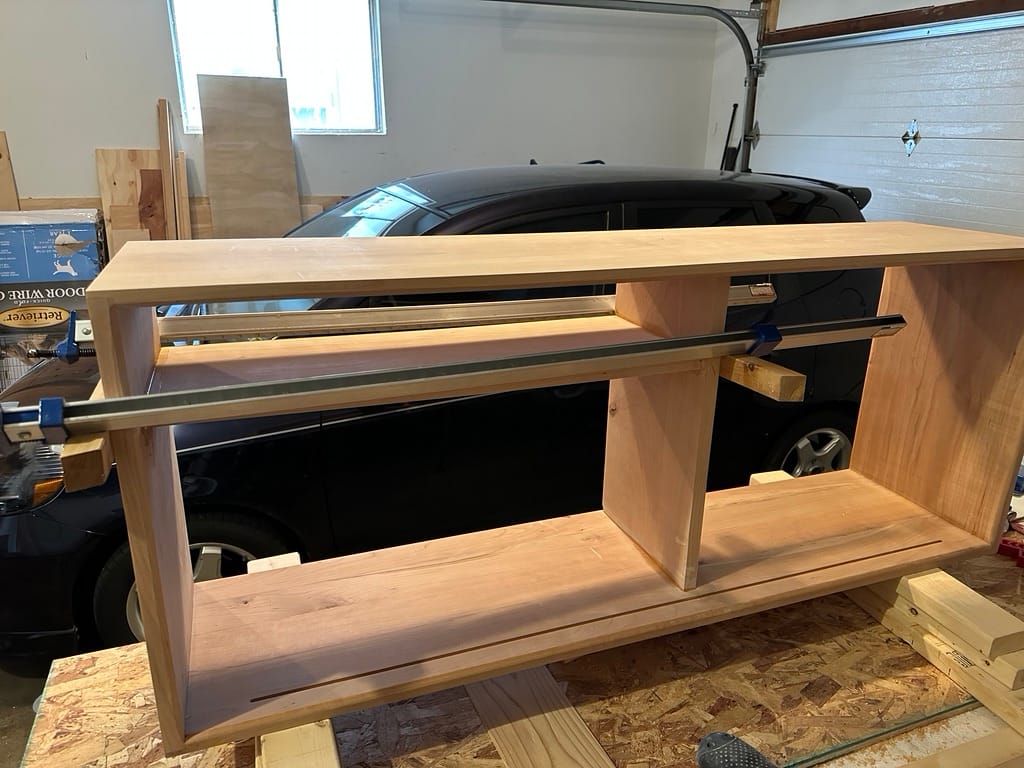
"I'm not sure if you heard me earlier when I said I needed all of the clamps you have in the building"
I didn't even have clamps long enough for the cabinet box glue-up to start with! There remains an iron law that no matter how many and what type of clamps you have ready to hand when you start, you will find yourself hastily heading back over to your rack for more. All's well that ended well.
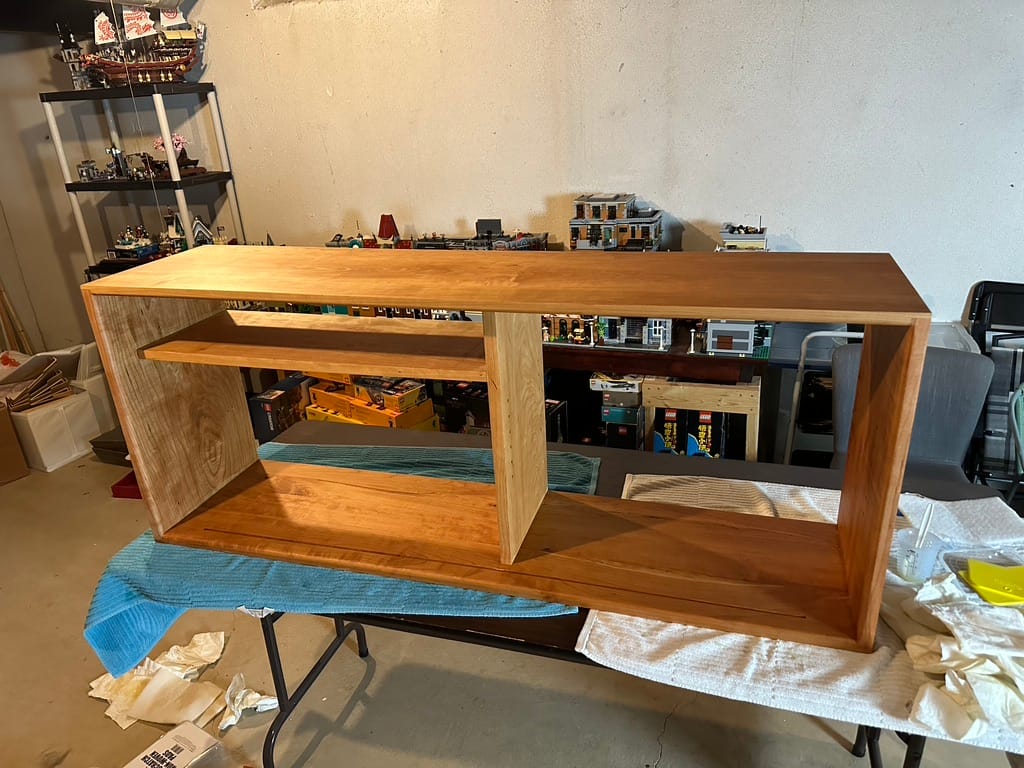
Making the transition in the project from 2d flat-packed panels to a 3d rough box was pretty thrilling, I can't lie. Especially when the dividers lined up plum and square and slid easily into the dadoes!
Step Four: Shelves, Drawers, and Sliding Doors
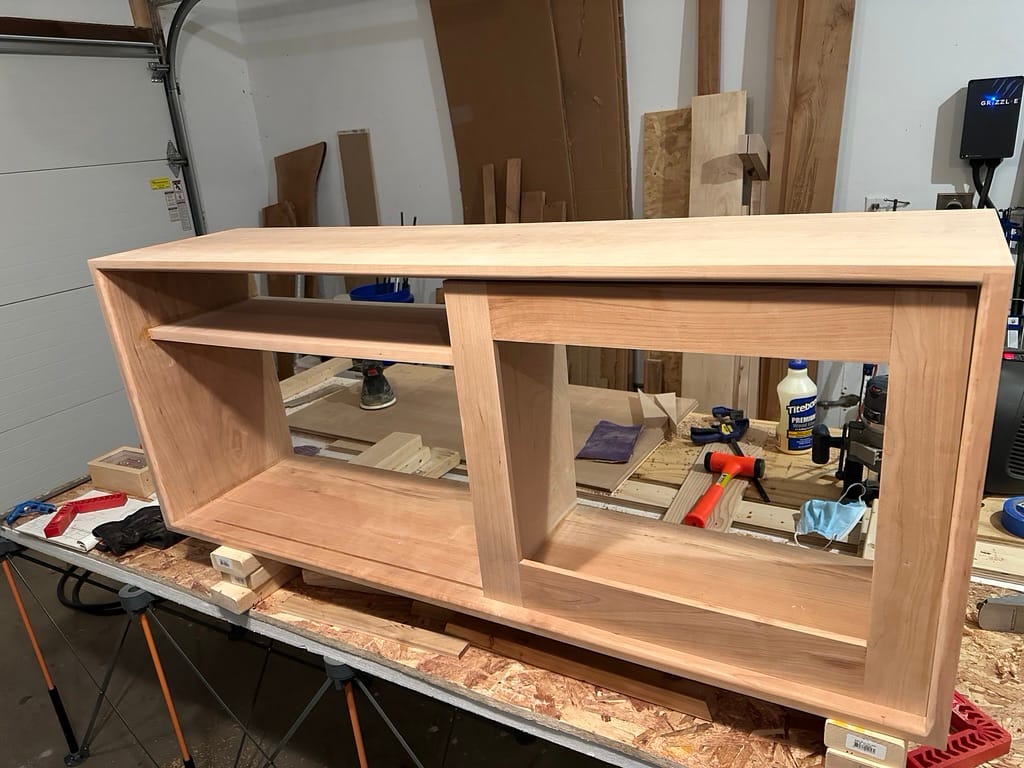
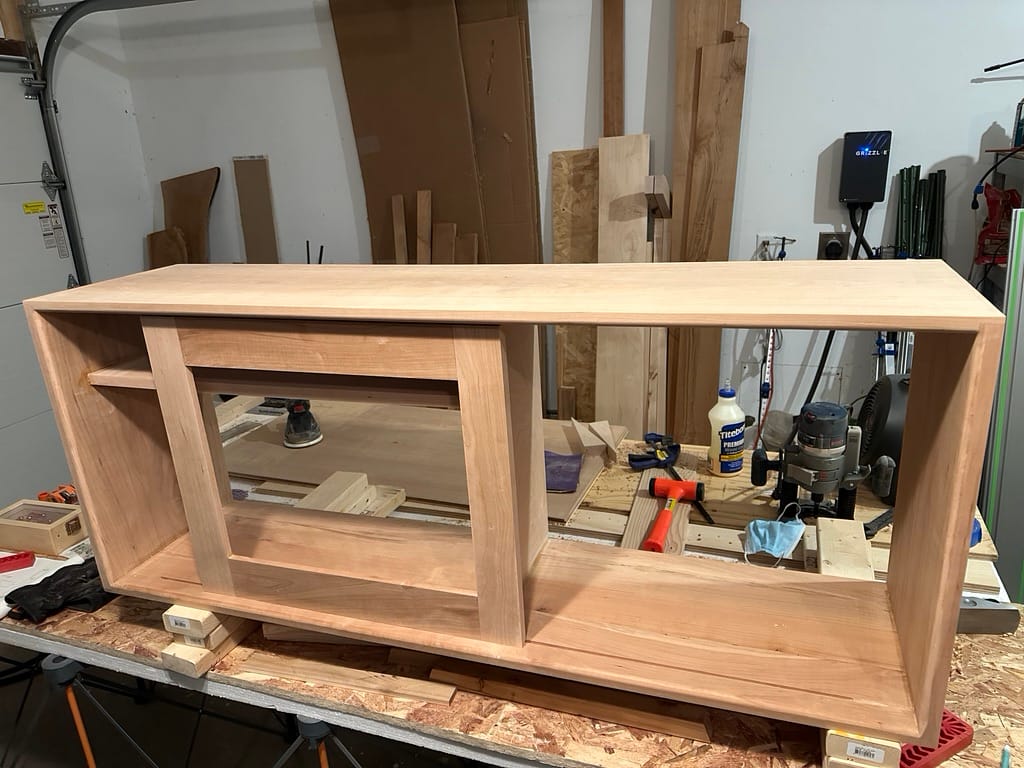
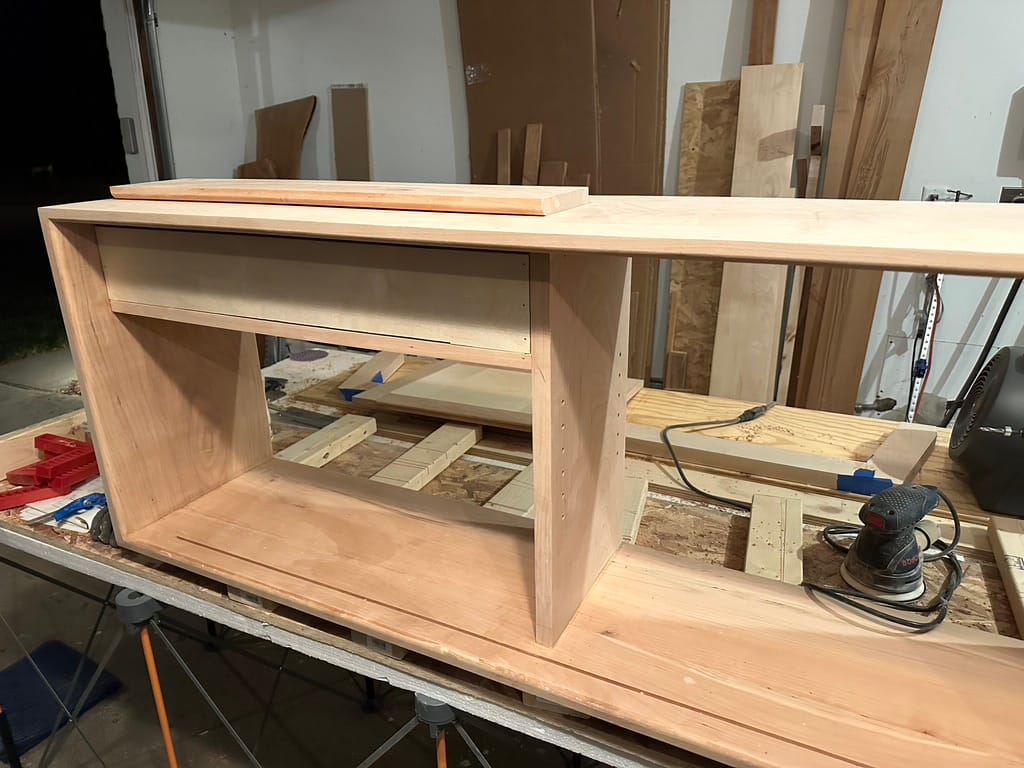
Brace for details
Speaking of the "thrill of properly aligned grooves" (🤣), making the sliding door was a delight, and having it slot into place and slide smoothly was also quite the relief. Belief began to dawn. I was not only trying this, I was doing it!
Then I made a costly mistake borne out of enthusiastic haste. The SawStop table saw is really a remarkably well engineered machine—even the compact one that I have is impressive. It's very easy and intuitive to replace the brake cartridge. I apparently missed a staple or some other bit of metal in the edge of the plywood panel I was squaring up for the drawer box when "ka-chonk", off it went. Taking my best saw blade with it. This too a learning experience. Hey, now I have the knowledge and confidence to replace the brake and double-check the edges of my boards for staples.
In related news, the drawer doesn't have hardware, since the budget for that went "somewhere else."
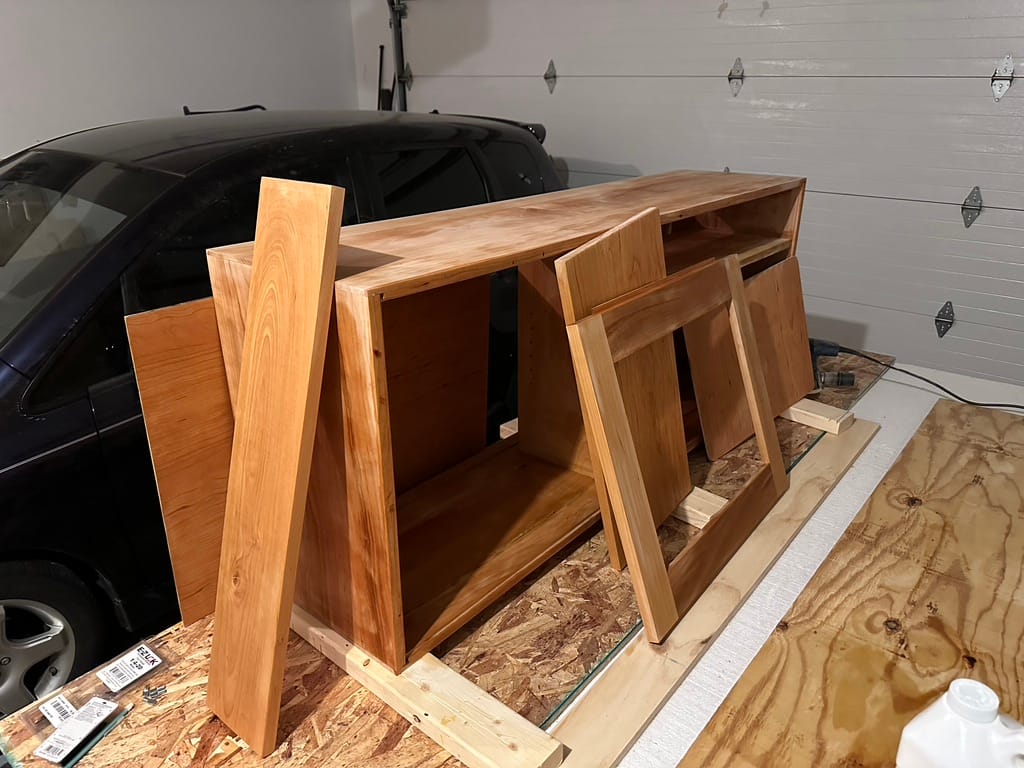
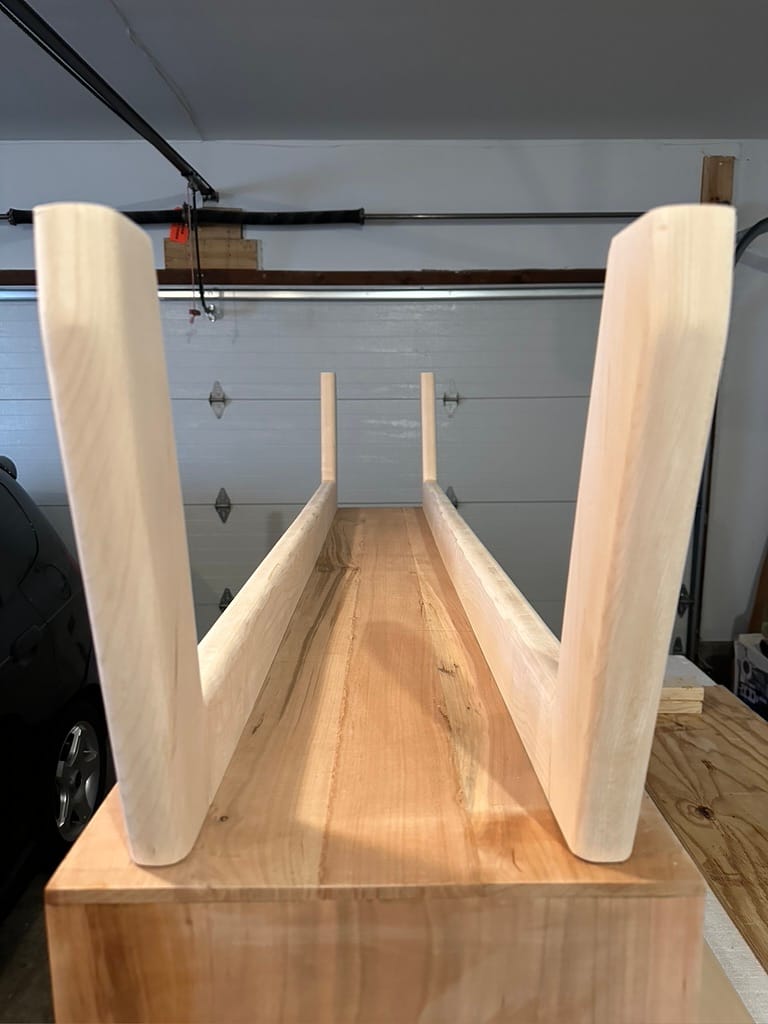
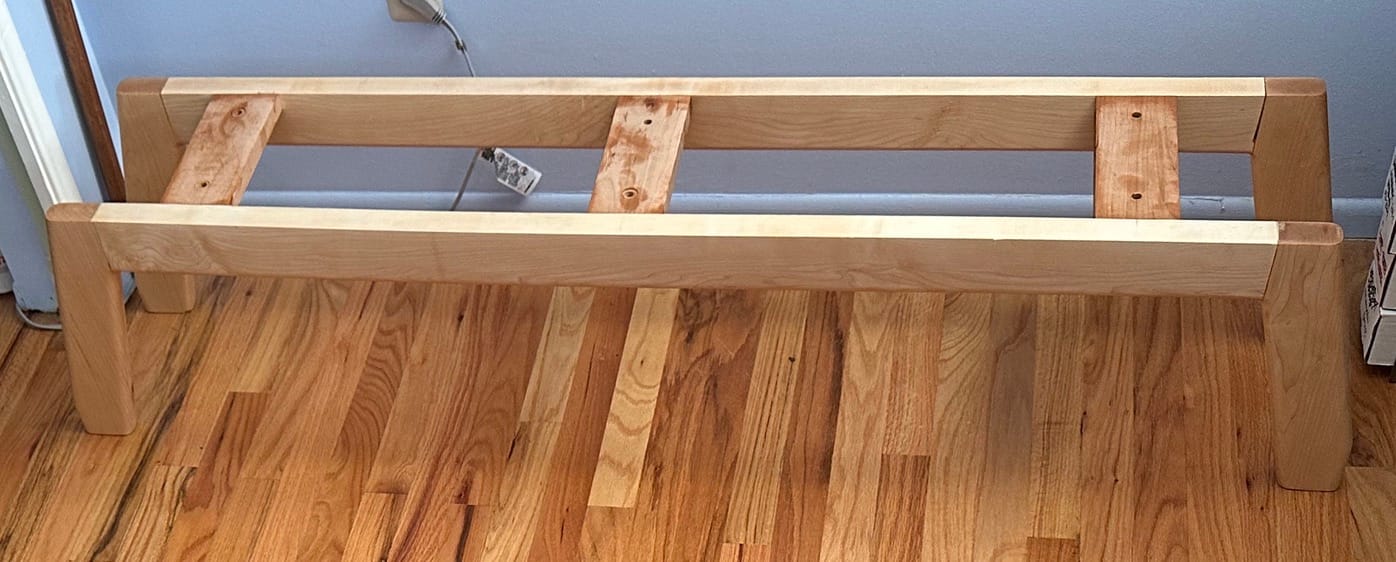
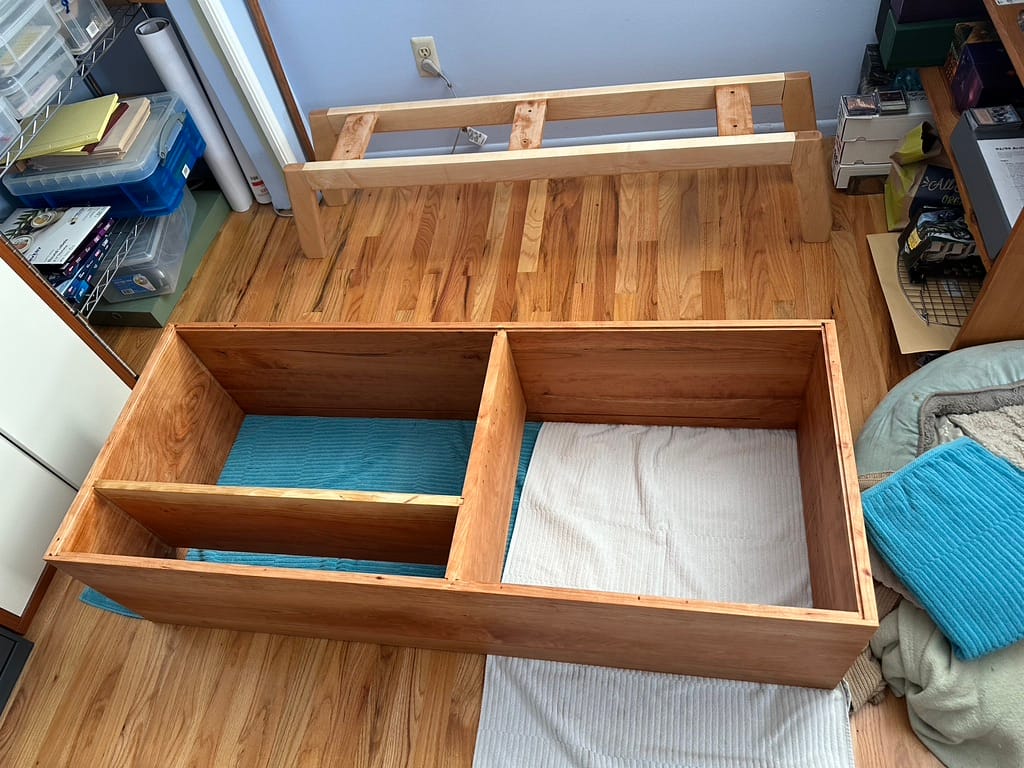
Step Five: Legs! Or: the Value of Templates
I knew I wanted the legs to contrast the rich cherry color of the case, and I found some lovely local hard maple that looked a treat. I also wanted to try something else here—assembling legs with angles, out of multiple parts, just like the folks I'd been watching on YouTube! So I settled on a pair of assemblies like so:
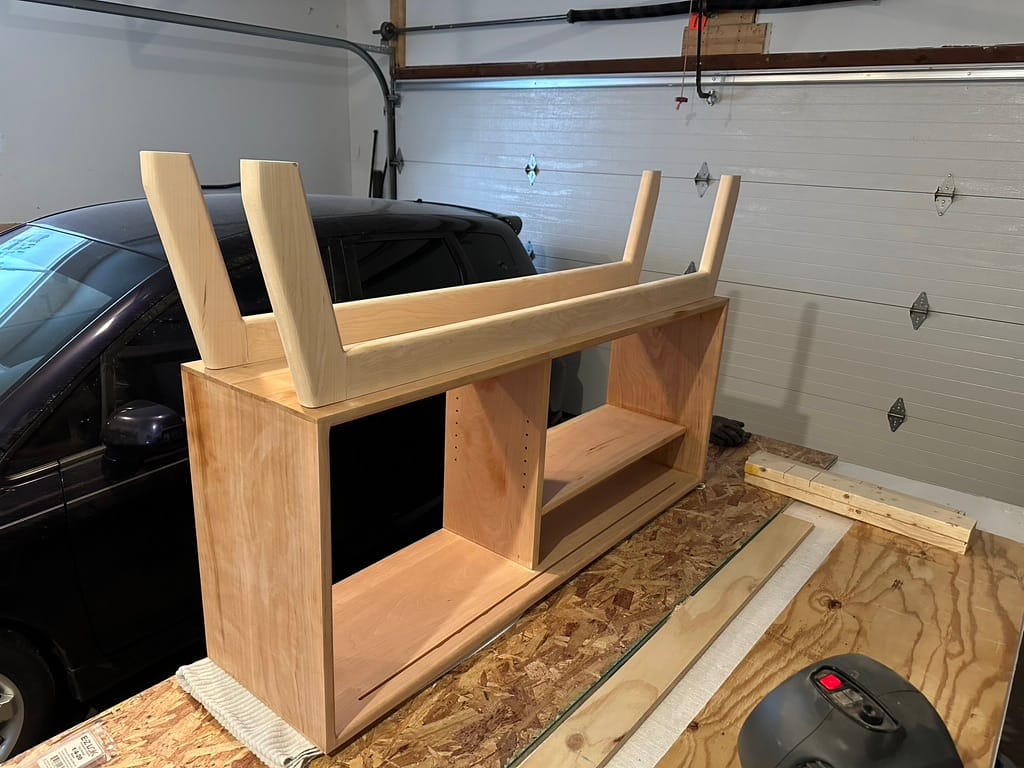
Legs, legs, legs!
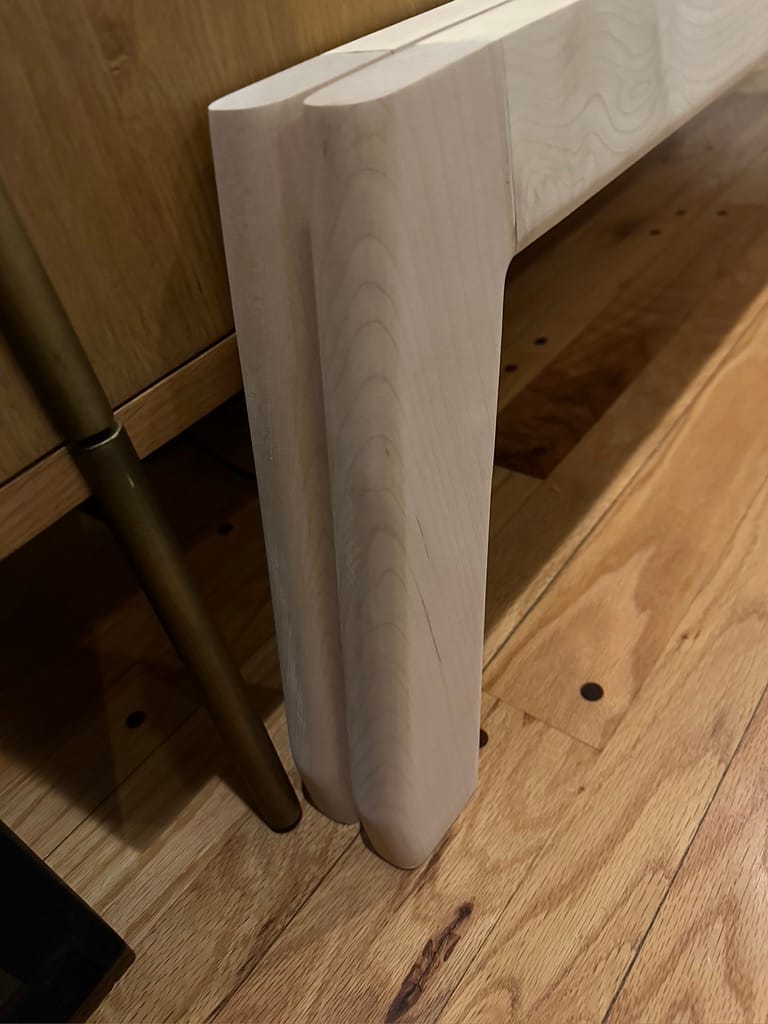
With nice, clean roundovers on all the sides not abutting the case, the legs splay out at a 15 degree angle from the stretcher beams, and are then knuckled back over vertically for the last 1 1/2". I'm really not sure why I decided on that angle or detail—it's just what "looked right" at the time.
Speaking of learning from mistakes, I managed to make three nearly bang-on identical leg blanks here, and whilst making the fourth managed to nick it up badly on the table saw. I had to set the project aside for a week or so, and when I returned I could not, for the life of me, reproduce an exact fourth copy! Something would conspire to go wrong at some part of the process no matter what I did! It is blessedly hard to tell from the pictures, but one of the four legs is not quite the same as the others.
And now I understand why professionals make templates!
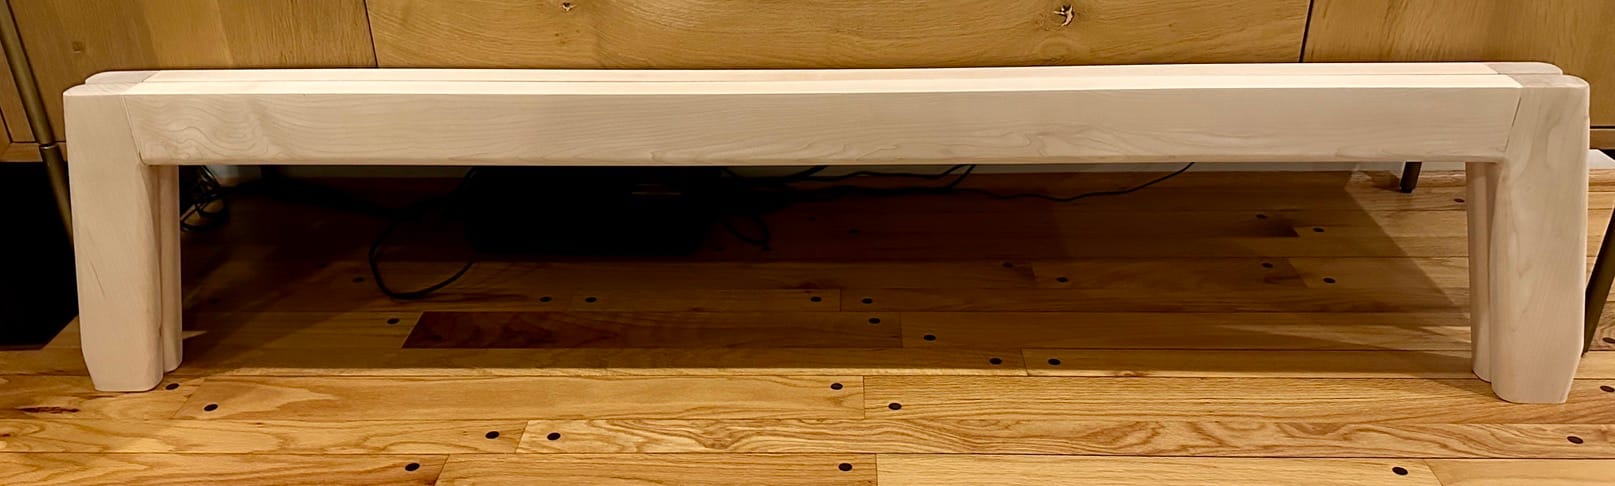
Step Six: The Finish Line
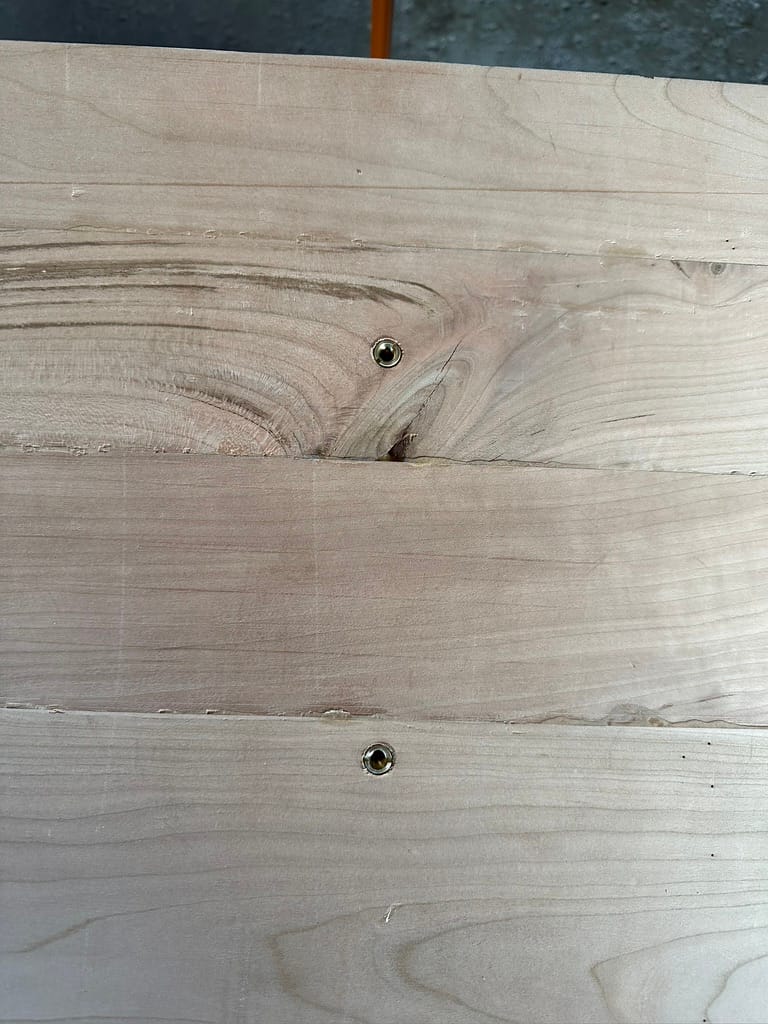
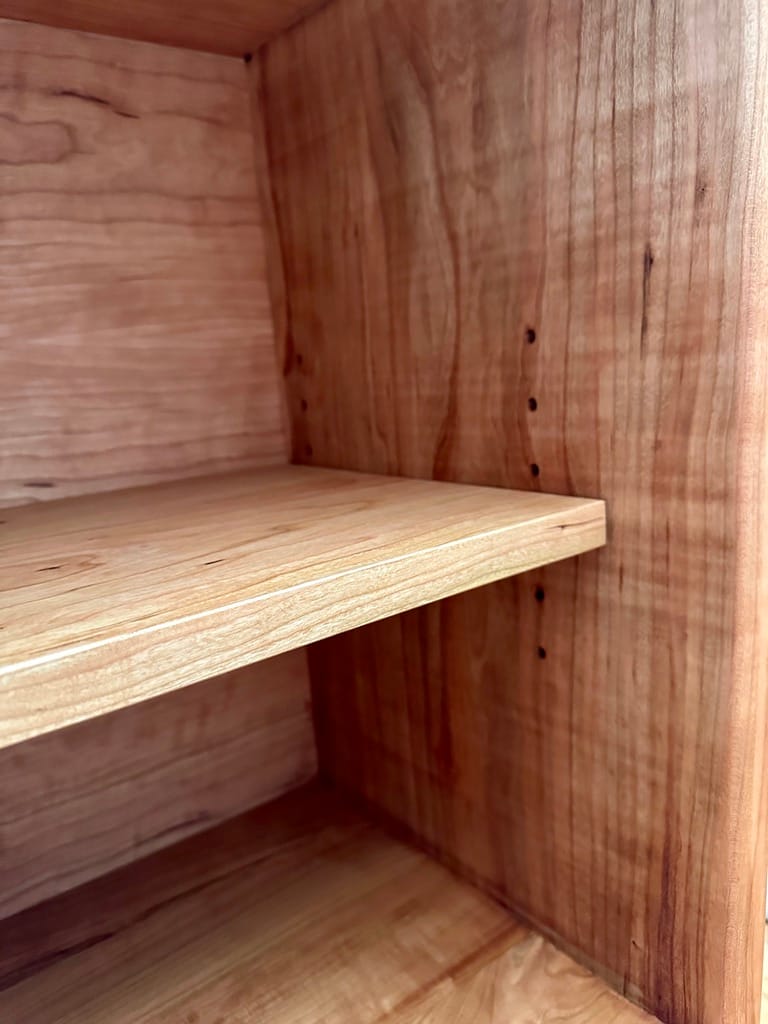
Finishing a project is really about all the little details: how to attach the leg assembly to the case (EZ Lok threaded inserts), how to drill holes for adjustable shelf pins (a Kreg jig), what sort of finish to use (Rubio pure), and, first and foremost, how to clean all the dang dust off once you've sanded and sanded.
Here I learned two things:
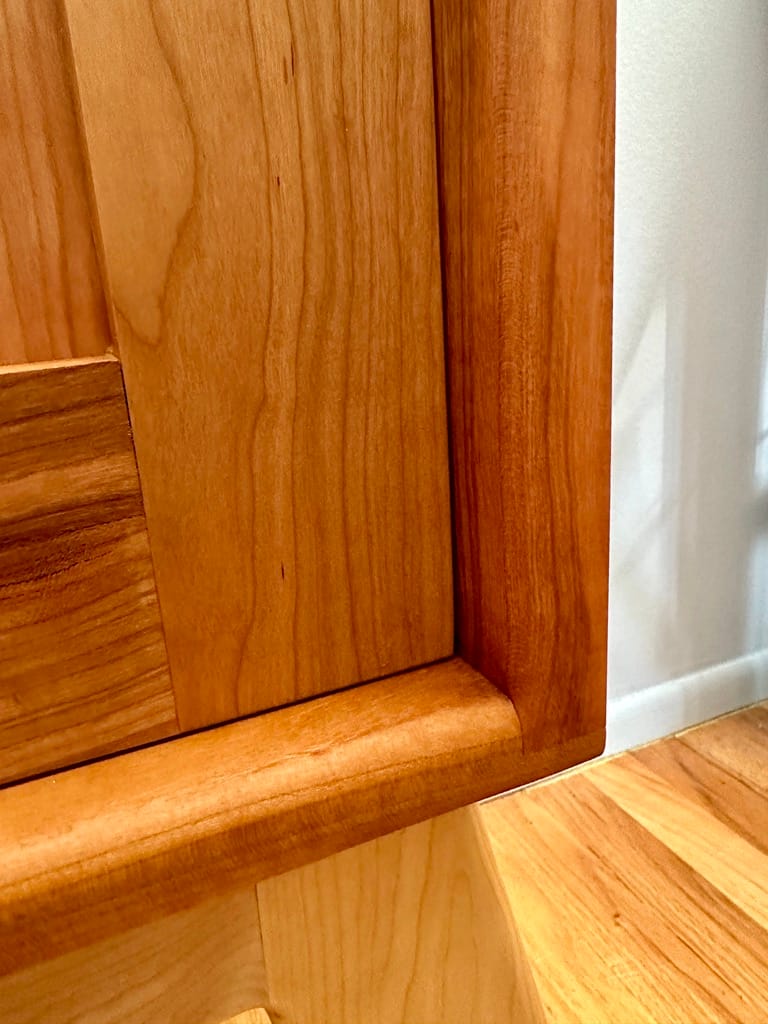
- I need a better glue clean-up system. I tried wiping up the excess glue with a damp rag, but this just smeared it around, staining the wood and giving me so much more sanding to do. And even with sanding and scraping, there's still visible glue staining in the corners. So I need a new approach there.
- Do not get the "Green" version of Kleen-Strip "Mineral Spirits". It's weirdly milky and does not want to dry. Normal mineral spirits evaporate in 5 or 10 minutes, which is why they're so useful for a last dust wipe-off. But this can of "green" product took 48 agonizing hours in front of a couple fans to dry.
Also, I really enjoyed my first experience with a hard-wax finish. It looks, in my humble opinion, great. It's not that difficult to apply, and is way more forgiving than stain or even polyurethane. I see why everyone on the internet uses them.
What's the Story?
Fulfilling a promise to myself made in July: I built my first piece of "real" furniture here in 2023—trying not just a new technique, but many new techniques and a bigger project scope! I made a fearsome number of mistakes along the way but the piece still came out nicely in the end. I am almost in disbelief that everything came together as well as it did, and I couldn't be happier to be standing at this end of the project.
Perhaps the story is just this: adapting "Who Dares Wins" to "Who Tries Can Build Furniture" :).
Hope your holidays are safe, cozy, and delightful.